Canva makes image overlays through its normal page and layer system. Add a background picture to a design, place another picture above it, then use Position, transparency, crop, and effects to control the result. This is a useful workflow when the overlay belongs inside a larger design with text, templates, brand assets, shapes, or multiple pages.
If the task is only to put one static image over another and download the result, opening a full Canva project can involve more setup than you need. A focused browser tool can move from upload to finished image without choosing a template, naming a project, or navigating a design sidebar.
This guide explains both methods honestly. OverlayImage.app is not a Canva integration and does not exchange files with Canva. It is an independent browser alternative for quick static image overlays.
How to overlay images in Canva
The exact labels can change as Canva updates its web and mobile interfaces, but the process is based on four concepts: upload, place, arrange, and adjust.
1. Create or open a Canva design
Choose a design size that matches the final destination. You might start with custom dimensions, a social-media preset, a presentation page, or an existing design.
The design page acts as the canvas. Its dimensions control the exported result, so choose the size before arranging the pictures. Changing dimensions later may require a paid Canva feature depending on the account and workflow, or may force you to create a new design and copy elements across.
2. Upload the pictures
Open Uploads and choose Upload files, then select the main photo and the image you want to place over it. You can also drag files onto the design page.
Add the main photo to the page. Resize it to fill the canvas or use it as the background. Then add the second image. It should appear above the first because newly added elements normally join the front of the layer stack.
For a logo or cutout, a transparent PNG is easier to use than a JPEG with a solid rectangle. Canva offers background-removal capabilities in some plans and contexts, but beginning with a clean transparent asset keeps the workflow predictable.
3. Position and resize the upper image
Drag the upper picture into place. Use a corner handle to maintain its proportions. Double-click or use crop controls when the visible part of the image needs to change without changing the size of its element box.
Canva provides alignment guides as elements move. For exact distribution or page alignment, open Position. Depending on the current interface, Position may expose alignment, spacing, and a layer list.
If you cannot select the correct picture, open the layer view or use the forward and backward arrangement controls. A solid upper image can completely cover a lower one even though both still exist.
4. Change transparency and effects
Select the upper image and find the transparency control. Lowering transparency lets the background image show through. This works well for watermarks, ghosted comparisons, and simple double exposures.
Canva also offers image adjustments, filters, shadows, and other effects. Available controls can depend on the asset, platform, plan, and current product interface. Use them with restraint: opacity and placement usually contribute more to a clean overlay than several effects applied at once.
5. Download the design
Open Share and choose the download option. Select PNG for graphic-heavy output; if you need transparent pixels, also enable Transparent background when that option is available for your plan. Select JPEG for a finished photo, or another format available in the current Canva workflow. Settings and format availability can vary by plan.
Inspect the download at full size. Text, thin logo edges, and transparent shadows are good places to look for compression or scaling problems.
A focused workflow for a simple image overlay
When you do not need templates, text, teams, stock assets, or a multi-page design, use a focused overlay editor.
Upload the main image
Open OverlayImage.app and choose the photograph that should define the canvas. There is no design preset to select because the main image supplies the working dimensions.
Add the upper image
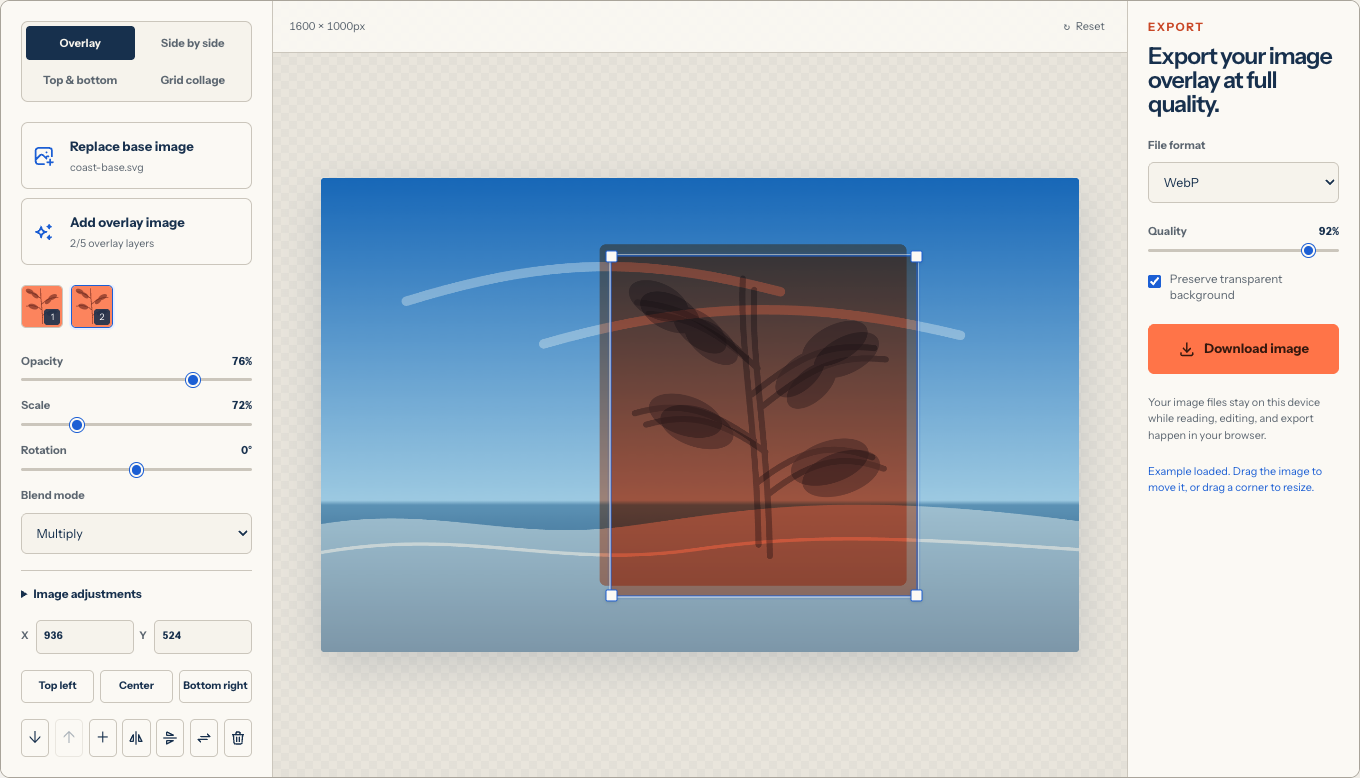
Add a logo, watermark, texture, transparent cutout, or second photograph. The new image becomes an independent layer. You can upload up to five overlay files in one composition.
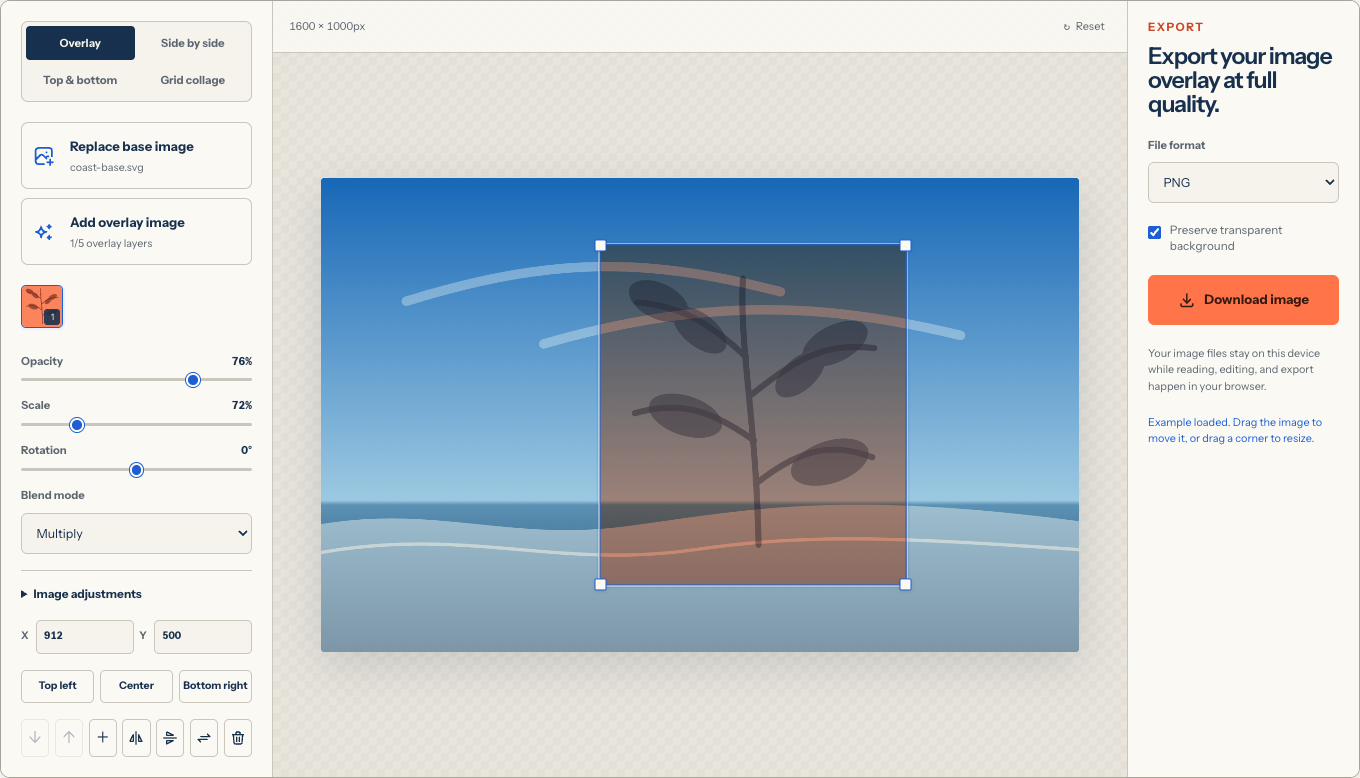
Arrange the layer directly on the canvas
Drag the image to move it and pull a corner to resize it proportionally. Use exact coordinates or alignment buttons when necessary. Adjust rotation, flipping, order, opacity, blend mode, brightness, contrast, saturation, and blur in the sidebar.
Export the result
Choose PNG, JPEG, or WebP, set quality where relevant, and download the composition. The tool does not add its own watermark.
Canva versus a focused image overlay tool
| Requirement | Canva | OverlayImage.app |
|---|---|---|
| Put one picture above another | Yes | Yes |
| Templates and predefined design sizes | Broad template library | Main image defines the canvas |
| Text and shapes | Strong design controls | Not currently provided |
| Multi-page projects and collaboration | Designed for project workflows | No accounts or saved projects |
| Static image blend modes | Effects and transparency vary by workflow | Twelve Canvas blend modes |
| Image layers | General design layer system | One main image plus up to five uploaded overlays |
| Browser-local working image processing | Depends on Canva’s online service workflow | Working files are processed in the current browser |
| Best use | Full social, presentation, brand, or template design | Fast overlay, merge, blend, and export task |
Canva is the stronger choice when the image is one element in a larger design. The focused tool offers a quicker workflow when the image composition itself is the whole task.
Common Canva overlay results
Add a logo to a social design
Upload a transparent logo, place it in a corner, and preserve clear space around it. Canva guides help alignment; a focused editor lets you use exact canvas coordinates. In either method, test the mark at the size the audience will actually see.
Place a portrait over a branded background
Use a portrait with a transparent background or remove the background before placement. Add a subtle shadow only if it improves separation. A heavy shadow can make the cutout feel disconnected from the background.
Create a photo blend
Place two photos over the same page, resize the upper one, and lower transparency. Canva can create a gentle blend through transparency and effects. If you specifically need Multiply, Screen, Soft Light, Difference, or other Canvas blend modes, the focused overlay editor exposes them directly.
Add a watermark
Place the watermark above the photo and reduce transparency. Avoid making the watermark so faint that it disappears after compression. For proof images that need stronger protection, duplicate and distribute the watermark carefully rather than covering every useful detail.
Problems you may encounter in Canva
The image snaps somewhere you do not want
Alignment guides and snapping help most layouts but can resist small manual adjustments. Zoom in, use keyboard movement where supported, or use a more precise positioning method. For simple image geometry, exact X and Y fields in a focused editor can be easier.
The background fills or crops unexpectedly
An image used as a Canva background may crop to fill the page. If every edge of the source must remain visible, use it as a normal image element instead of a full-bleed background, or create the final canvas externally before inserting it.
You cannot select the lower picture
Use the Position/layers view or send the upper element backward temporarily. Locked elements may need to be unlocked before editing.
A transparent logo downloads with an unwanted background
Verify that the source is actually transparent and that the chosen download format and settings preserve transparency. JPEG cannot preserve transparent pixels.
The project is more complicated than the result
If the final deliverable is only one combined picture, complete the overlay separately and upload the finished file to Canva. It then behaves as one element and cannot drift apart inside the larger design.
When to combine both workflows
The two methods are complementary. Create a photo blend, watermark, or fixed logo treatment in OverlayImage.app, export it, and then use the result as a single asset in Canva. This keeps the image relationship stable while Canva handles text, templates, brand colors, animation, collaboration, or multiple page sizes.
The reverse also works: export a transparent graphic element from Canva, then place it above a photograph in the browser overlay tool. Always confirm that you have permission to use the source assets and that the export settings preserve the required transparency.
Frequently asked questions
How do I put one image over another in Canva?
Add both pictures to the same design page, move the second above the first, and use Position or layer controls to change their stacking order.
How do I make the top image transparent in Canva?
Select the picture and use Canva’s transparency control. Lower the value until the lower image becomes visible. Interface location may differ between desktop and mobile versions.
Does Canva support transparent PNG files?
Canva can import transparent PNG assets. Exporting a design with a transparent background may depend on the current product plan and settings.
Is OverlayImage.app connected to Canva?
No. It is an independent browser tool. Files are not transferred automatically between the services; download from one and upload to the other when combining workflows.
How are working images handled by OverlayImage.app and Canva?
OverlayImage.app reads and composites working files in the current browser without sending them to an image-processing server or cloud project. Canva is an online design platform with its own account, storage, and privacy terms.
If your goal is one clean static composition, overlay the images directly in your browser. If you need a broader explanation first, read How to Overlay Images Online.