Add up to five image overlay layers
Start with one main photo, then add logos, textures, stickers, transparent PNGs, or more photographs. Every added layer remains independently selectable and editable until export.
Start an image overlay, then select, move, and resize up to five layers directly on the canvas.
Use the workspace above to overlay images online with up to five editable layers. You can also merge images horizontally, vertically, or in a grid collage. Every step happens locally in your browser; files are never sent to a server or stored in the cloud.
A focused image overlay tool finishes the job without making you learn a design suite.
OverlayImage.app keeps the controls a free image overlay tool actually needs: independent layers, direct placement, natural photo blending, and clean export without an added watermark or a separate project workflow.
Start with one main photo, then add logos, textures, stickers, transparent PNGs, or more photographs. Every added layer remains independently selectable and editable until export.
Select the overlay on the canvas, drag it into place, resize it from four corners, rotate or mirror it, and move the layer forward or backward.
Use Normal for logos, Multiply for paper and shadow textures, Screen for light leaks, Soft Light for gentle color, or Difference and Exclusion for experimental composites.
Adjust brightness, contrast, saturation, blur, and opacity for each layer. The preview updates immediately, so refinements stay visual instead of disappearing into dialogs.
Reading, editing, compositing, and export happen locally in your browser. Your working images stay on your device and are never attached to an account.
Choose PNG for transparency, JPEG for familiar photo sharing, or WebP for a smaller web-ready result. Quality controls remain available when compression matters.
A clean overlay keeps both sources legible while giving the shared area a purpose. Here, a warm botanical layer meets a cool coastal frame; Multiply and reduced opacity make the intersection the focal point without hiding either image.
Build your own composition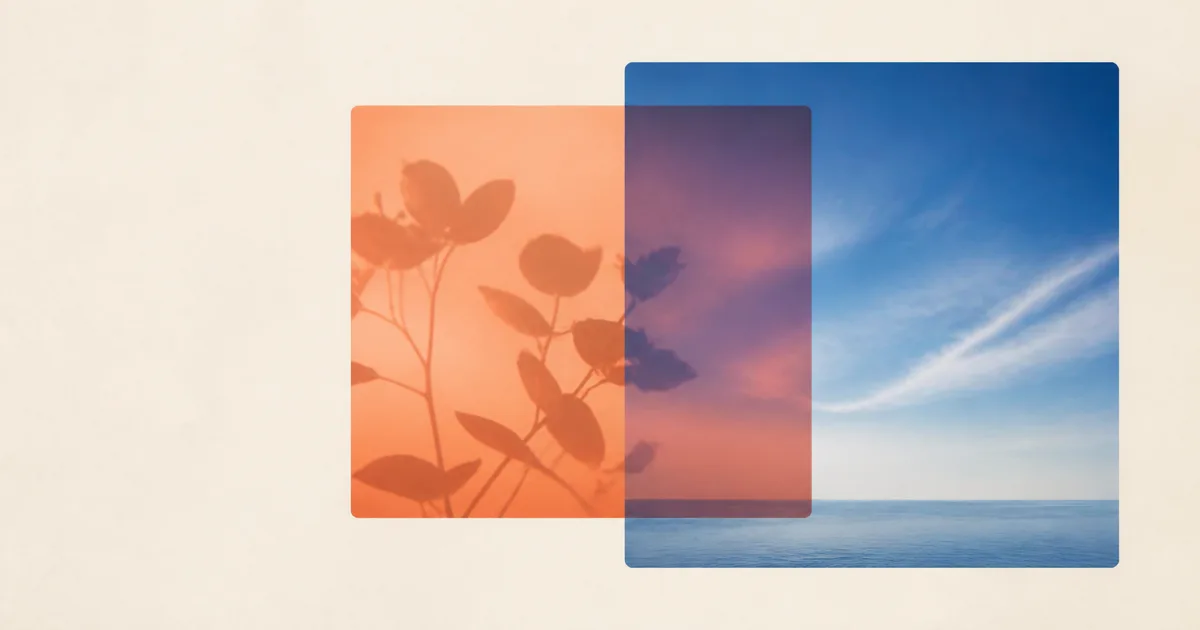
The same layer controls solve practical brand work, everyday photo edits, and expressive compositions. Start with the result you need, then use only the controls that support it.
Place a transparent logo over product photography, event images, or portfolio work. Set a consistent size, choose a corner, and lower opacity when the mark should feel discreet.
Protect previews without covering the subject. Add one or several watermark layers, rotate them when needed, and keep the original photo untouched on your device.
Combine a portrait with texture, a skyline with clouds, or two exposures of the same scene. Blend modes create a richer relationship than opacity alone.
Switch to a horizontal or vertical layout for before-and-after images, product variants, progress photos, visual instructions, and compact comparison graphics.
Use paper grain, film dust, color washes, shadows, or light leaks as image overlays. Screen, Multiply, and Soft Light help the texture belong to the main photograph.
Place a campaign badge, price marker, product detail, or decorative layer over a clean photo, then export a sharp file for a post, listing, email, or presentation.
The image overlay tool needs no project setup or account. Choose two images and the first useful preview appears on the same page where you started.
Upload the photo that should define the final canvas. Your browser can open common PNG, JPG, WebP, GIF, and SVG files directly.
Add the logo, watermark, texture, sticker, or second photo that belongs on top. Continue until the composition has the layers it needs, up to five.
Drag the selected layer, set its scale and rotation, then refine opacity, blend mode, color, and sharpness. Switch layouts when you want to merge images instead of overlapping them.
Choose PNG, JPEG, or WebP, preserve transparency where appropriate, and download the result at its working pixel dimensions without an added watermark.
An image overlay begins with one visual above another. Quality comes from choosing the right mode, establishing hierarchy, and exporting for the final use. This guide explains how to overlay images without requiring professional editing experience.
An image overlay places one picture in front of another on the same canvas. Shared pixels make this useful for logos, watermarks, textures, cutout subjects, light effects, and double exposures. Opacity controls visibility, while layer order decides which image has priority.
An image merge joins complete pictures without overlap. Side-by-side and vertical layouts suit comparisons, while grid collage arranges three or more images into rows and columns. Blend modes such as Multiply or Screen combine pixels inside the shared area.
The main image defines the width, height, and visual setting of the composition. Preserve the framing that matters most: a product photo for shop graphics, a landscape for light effects, or a finished photograph for a watermark. A larger, sharper main image gives the final export more detail.
Look for quiet space before adding a logo, and keep textures away from important detail. When every source must remain fully visible, choose a horizontal, vertical, or grid-collage layout instead.
Placement communicates importance. A centered overlay becomes the subject, while a small corner layer behaves like a signature. Drag the selected layer first, then adjust its scale so size and visual center work together.
Use rotation and flipping with restraint. A few degrees can align perspective; a strong diagonal can dominate the frame. With several layers, vary size and opacity so one leads while the others support it.
Opacity changes visibility without changing how colors combine. It works well for a watermark, translucent badge, or ghosted comparison. Start at full opacity for an opaque logo and around 30–60 percent for a subtle texture, then judge the result against the actual photo.
Multiply keeps darker detail for ink and shadow; Screen keeps lighter detail for flares. Soft Light is gentler than Overlay or Hard Light. If a mode harms skin tones, product colors, or text, return to Normal and adjust opacity.
Transparent PNG or SVG files make clean logo image overlays because they avoid a rectangular background. Check edges at the intended size, avoid stretching the mark, and leave enough space from the canvas boundary for different screens and crops.
Match texture scale to the main photo. Large grain can look pasted on; tiny grain may disappear after export. Brightness, contrast, saturation, and a small blur can help the added layer belong while the source files remain unchanged.
Choose PNG when transparency, crisp logos, interface graphics, or repeated editing matter. Choose JPEG for a finished photograph on an opaque background, and adjust quality until the file is compact without visible blocks. WebP often produces a smaller web image while supporting transparency.
Check canvas dimensions and preview fine lines at full size. Overlay mode follows the main photo dimensions, while merge layouts grow to fit every source. The finished file is created locally in your browser.
Quick answers about the image overlay tool, supported files, privacy, output quality, mobile use, and the difference between overlaying and merging images.
Upload a main image, add an overlay layer, then drag the selected layer on the preview. Adjust scale, rotation, opacity, and blend mode before downloading the finished image overlay.
Yes. The image overlay tool is free to use, requires no registration, and does not add a watermark to your exported image.
No. Image reading, editing, compositing, and export all happen locally in your browser. Your files are never sent to a server or stored in the cloud.
You can open common browser-supported formats including PNG, JPEG, WebP, GIF, and SVG. Finished compositions can be exported as PNG, JPEG, or WebP.
Yes. Use one main image and add up to five overlay layers. Each layer keeps its own position, scale, rotation, opacity, blend mode, flip, and adjustment settings.
Overlay places images in the same canvas area so they can cover or blend. Side-by-side and vertical modes join complete images in one row or column. Grid collage is best for 3 or more images and arranges them into multiple rows and columns.
Yes. The editor is responsive and supports touch dragging. Very large photos can still depend on the memory available in your mobile browser, so closing unused tabs may help.
Use Normal for logos and direct placement, Multiply for dark textures, Screen for light effects, and Soft Light for subtle color. Try modes visually and return to Normal when accurate colors matter most.
Open the free image overlay tool, add your images, control every layer, and download the result. No project dashboard, installation, or detour from landing page to editor.
Open the image overlay tool