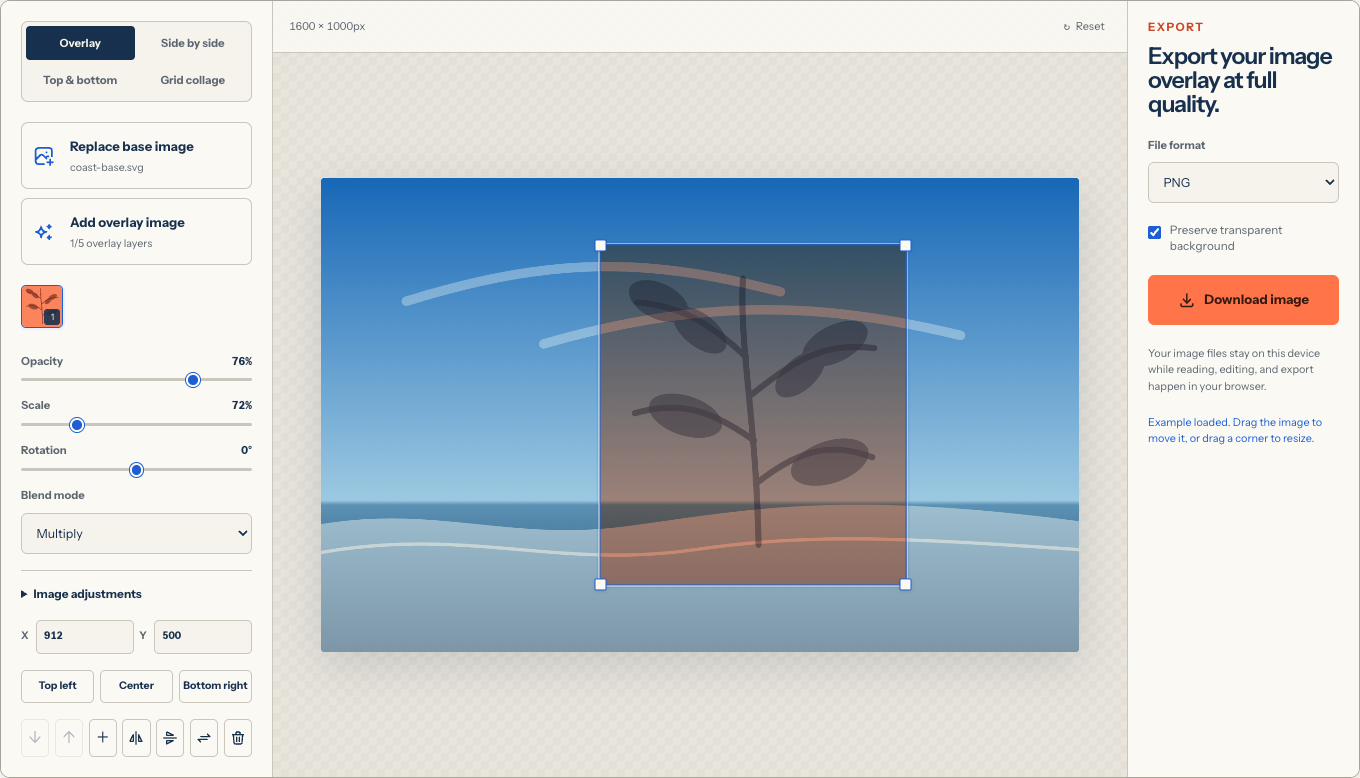
Overlaying images means placing one picture above another on the same canvas. The upper picture might be a transparent logo, a watermark, a texture, a sticker, a cutout subject, or an entire second photograph. Unlike a side-by-side merge, an overlay lets both images share the same area. You decide which layer sits on top, where it appears, how large it is, and how its pixels interact with the picture below.
You do not need a full design suite for this job. With OverlayImage.app, the complete workflow happens in the browser: choose a main image, add one or more overlay layers, position them directly on the canvas, and download the result. There is no registration step and the exported image does not receive a platform watermark.
This guide walks through the process carefully, then explains opacity, blend modes, file formats, and the mistakes that most often make an image overlay look accidental.
What you need before you overlay images
Prepare at least two image files:
- The main image defines the canvas dimensions in Overlay mode and usually supplies the scene, product, portrait, or background you want to preserve.
- The overlay image is placed above it. This might be a PNG logo, a signature, a decorative element, a light effect, or another photo.
Common browser-supported inputs include PNG, JPEG, WebP, GIF, and SVG. If you need the area around a logo or cutout to remain invisible, use a PNG, WebP, or SVG file with transparency. A JPEG cannot contain a transparent background, so a logo saved as JPEG will usually bring a visible rectangle with it.
It also helps to begin with files that are large enough for the final use. Enlarging a small overlay can make its edges soft. Starting with a sharp main photo and a reasonably sized overlay gives you more freedom to position and resize without sacrificing clarity.
How to overlay images online in four steps
1. Upload the main image
Open the free image overlay tool and select Upload base image. Choose the photograph or graphic that should establish the final width and height. The editor reads the file locally and displays it on the canvas.
2. Add the overlay image
Select Add overlay image and choose the picture that belongs above the main image. The new layer appears on the canvas and becomes the selected layer. You can upload up to five overlay files, which is enough for combinations such as a logo, a subtle texture, and a campaign badge without turning the editor into a crowded design application.
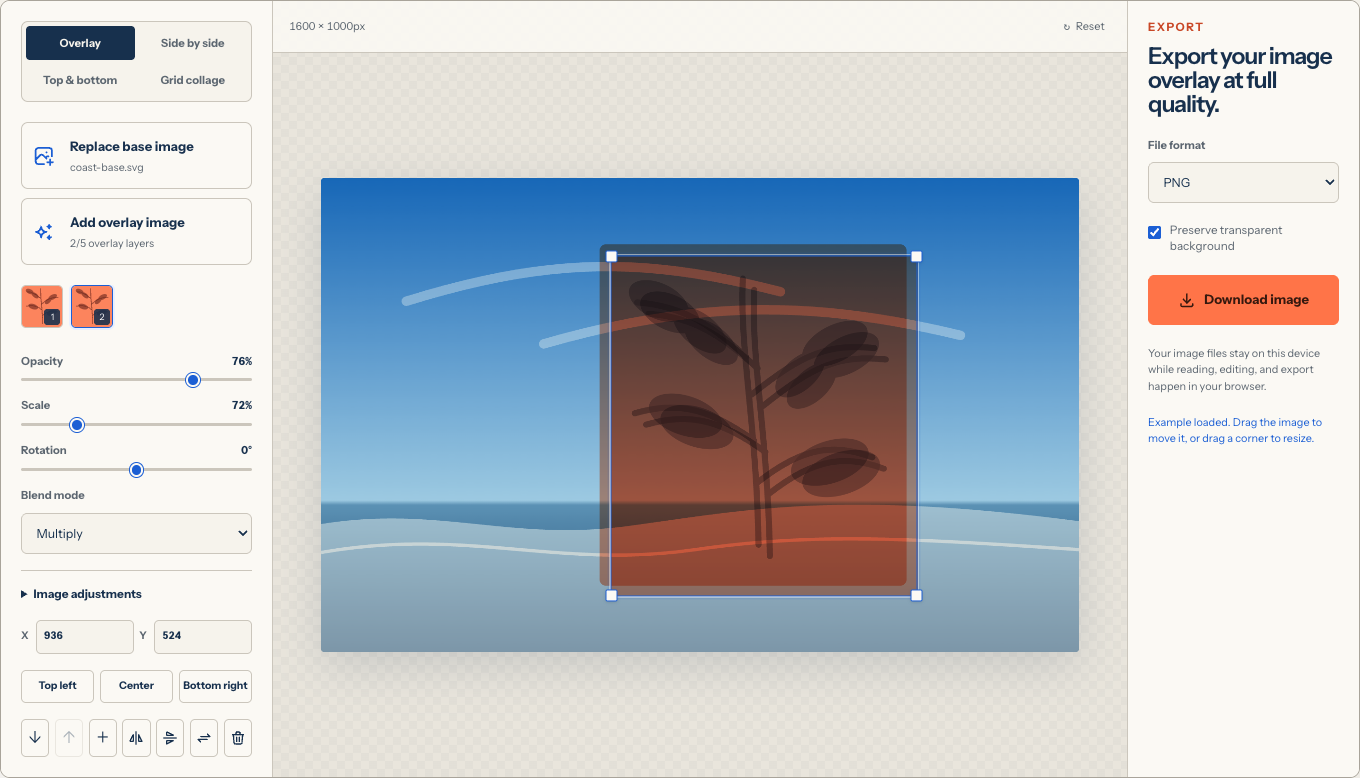
Each overlay remains independent. Selecting a different thumbnail changes which layer receives your movement, scale, rotation, opacity, blend, and color adjustments.
3. Position, resize, and blend the layer
Drag the selected picture directly on the canvas to move it. Drag one of the four corner handles to resize it proportionally. The handles keep the original aspect ratio, so circles remain circular and logos do not become stretched.
Use the sidebar when you need precise values. You can enter exact X and Y coordinates, center the layer, rotate it, flip it, duplicate it, or move it forward and backward in the stack. These controls are especially useful when several images overlap and a lower layer is difficult to select directly.
Start with the Normal blend mode. Lower the opacity if the upper picture should feel subtle. When you are adding texture, light, or shadow rather than a solid object, try a blend mode:
- Multiply keeps darker information and works well for paper texture, ink, and shadow.
- Screen keeps lighter information and is useful for light leaks, clouds, and glow.
- Soft Light adds gentle contrast and color without the strength of Overlay or Hard Light.
- Difference and Exclusion create experimental color interactions.
Judge the result at the size in which it will be used. A watermark that looks restrained on a large desktop preview may become too faint on a phone. A texture that looks detailed at full resolution may disappear when a social platform reduces the image.
4. Export the finished image
Choose PNG, JPEG, or WebP in the export panel. PNG is the safest choice for transparent output, crisp logos, and graphics that may be edited again. JPEG works well for finished photographs on an opaque background. WebP can produce a smaller web-ready file while preserving transparency when needed.
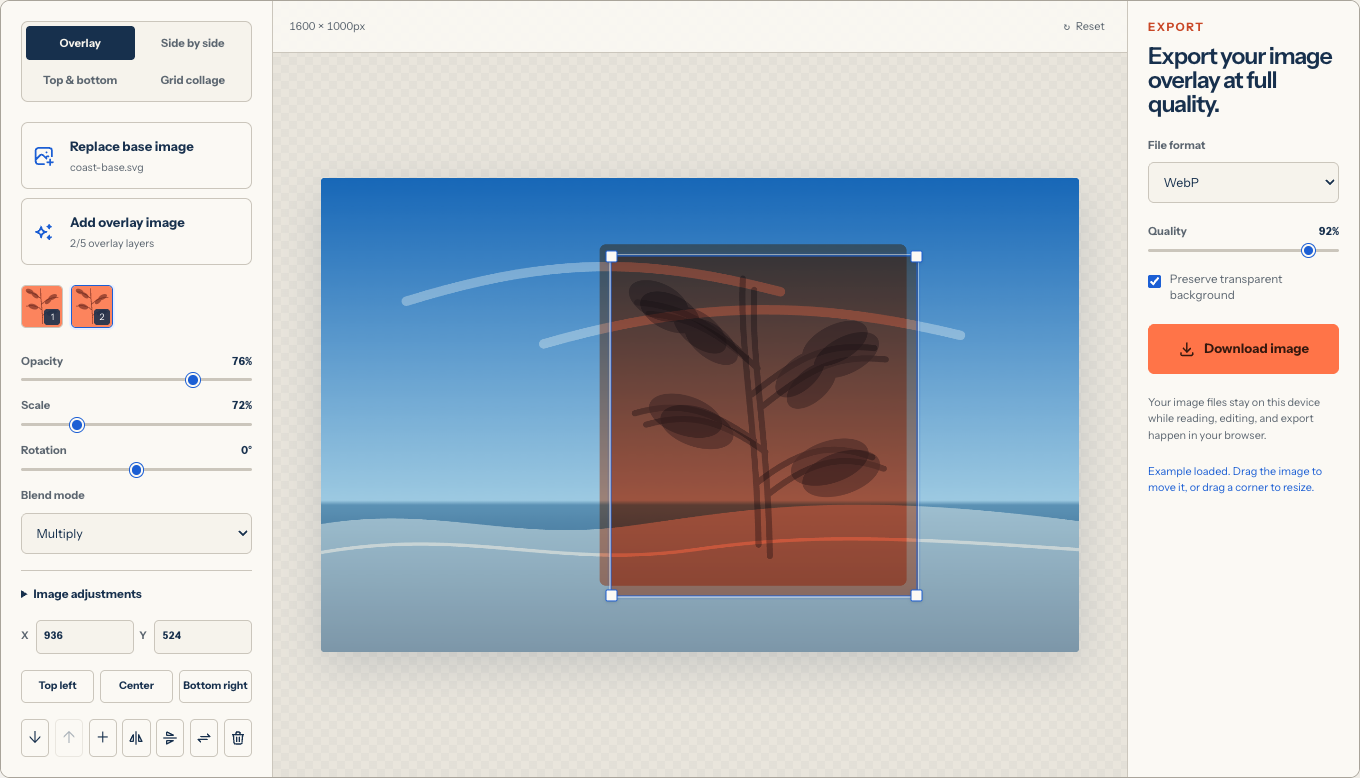
For JPEG and WebP, adjust the quality control before downloading. A setting near the high end usually preserves photographic detail while avoiding the largest possible file size. Inspect text, hair, fine lines, and hard logo edges because compression artifacts are easiest to notice there.
Select Download image when the preview is ready. The canvas is rendered at its working pixel dimensions and saved to your device.
How to make an image overlay look intentional
The technical act of putting one image over another is simple. The visual result depends on hierarchy. Decide which picture should be noticed first and let the remaining layers support it.
For a logo, a corner placement usually feels quieter than the center. Leave space between the mark and the canvas edge so it survives different crops. If the underlying photo is busy, move the logo into an area with less detail or add a subtle transparent backing inside the logo asset itself.
For two full photographs, identify the subject in each one. Avoid placing a face, product label, or important horizon directly beneath the busiest part of the upper image. Move the overlay until the subjects relate rather than compete. Then adjust opacity or a blend mode.
For texture, scale matters. Grain that is much larger than the details in the main image can look pasted on. Grain that is extremely small may vanish after export. Resize the texture until its visual frequency matches the photograph, then use brightness, contrast, saturation, or a small blur to help it belong.
Overlay, merge, and blend are different
These terms are often used interchangeably, but they describe different results:
| Method | What happens | Best for |
|---|---|---|
| Overlay | Images share the same canvas area and one layer sits above another | Logos, watermarks, textures, cutouts, double exposures |
| Merge | Complete images are joined without covering each other | Before-and-after comparisons, instructions, photo strips |
| Blend | Pixel colors from overlapping layers are mathematically combined | Light effects, paper texture, color treatment, artistic composites |
OverlayImage.app supports all three approaches. Use Overlay for shared space, Side by side or Top & bottom for a direct merge, and Grid collage when three or more complete pictures should be arranged in rows and columns.
If you are unsure which one you need, read How to Put One Image on Top of Another for practical picture-on-picture and side-by-side examples, or simply begin in Overlay mode and switch layouts without reloading your source files.
Common image overlay mistakes
Stretching the overlay
Changing width and height independently distorts logos, faces, and geometric shapes. Resize from a corner in the browser tool so the aspect ratio remains locked.
Repeating a watermark too aggressively
A watermark should discourage unauthorized reuse without becoming the subject. Begin with one mark, reduce opacity, and view the image at normal display size. Add more marks only when the use case genuinely requires stronger coverage.
Choosing a blend mode before positioning
Blend modes can make an unbalanced composition feel temporarily interesting, but they do not fix poor placement. Establish position and size first. Apply opacity and blend modes after the visual hierarchy works in Normal mode.
Exporting the wrong format
Saving a transparent result as JPEG replaces transparency with a solid background. Saving every photograph as PNG can create an unnecessarily large file. Choose the format for the destination rather than using the same one by habit.
Editing the only copy of a source file
Keep the originals. The browser tool does not modify them, and the exported composition is a new file. That gives you a safe path back if you later need a different crop, placement, or output size.
Privacy and browser performance
OverlayImage.app reads, composites, and exports working image files in the current browser. The files are not uploaded to an image-processing server or placed in cloud storage. This is useful for personal photographs, unfinished campaign assets, and client work that should not become part of an online account.
Local processing also means the available memory comes from your device. Very large camera files and several full-resolution layers can require substantial memory, especially on a phone. If the browser becomes slow, close unused tabs, reduce the dimensions of unusually large source images, or create the composition with fewer simultaneous layers.
Frequently asked questions
Can I overlay more than two images?
Yes. Start with one main image and upload up to five independent overlay layers. Each layer keeps its own position, scale, rotation, opacity, blend mode, flip, and adjustment settings.
Can I overlay a transparent PNG?
Yes. Transparent PNG files are ideal for logos, signatures, stickers, and cutout subjects. Export the final result as PNG or WebP if the finished canvas also needs transparency.
Does lowering opacity do the same thing as using a blend mode?
No. Opacity changes how visible a layer is. A blend mode changes how the pixels in that layer combine with the pixels beneath it. You can use both at the same time.
Will the exported image contain a watermark?
No. OverlayImage.app does not add a platform watermark. A watermark appears only when you add one of your own as an overlay layer.
Can I do this on a phone?
Yes. The editor supports responsive layouts and touch dragging. For a phone-specific walkthrough, see How to Overlay Images on iPhone.
Ready to make the composition? Overlay your images online now, adjust every layer in the live preview, and download the finished file.